Setting Up a Simple Server Monitor with Beszel
Beszel
Getting Started
In this section, I will talk how to setup the beszel in my two servers using docker-compose.
Running the Hub
Since my services heavily rely on Docker, I decided to use Docker Compose to set up Beszel. It’s a straightforward way to manage both the hub and agent. I started with the official docker-compose.yml file from the Beszel documentation:
1
2
3
4
5
6
7
8
9
10
11
12
13
14
15
16
17
18
19
20
21
22
23
services:
  beszel:
    image: henrygd/beszel:latest
    container_name: beszel
    restart: unless-stopped
    ports:
      - 8090:8090
    volumes:
      - ./beszel_data:/beszel_data
      - ./beszel_socket:/beszel_socket

  beszel-agent:
    image: henrygd/beszel-agent:latest
    container_name: beszel-agent
    restart: unless-stopped
    network_mode: host
    volumes:
      - ./beszel_socket:/beszel_socket
      - /var/run/docker.sock:/var/run/docker.sock:ro
    environment:
      LISTEN: /beszel_socket/beszel.sock
      # Do not remove quotes around the key
      KEY: 'UPDATE WITH YOUR PUBLIC KEY (copy from "Add system" dialog)'
To start the services, I ran:
1
docker compose up -d
Create an Admin User
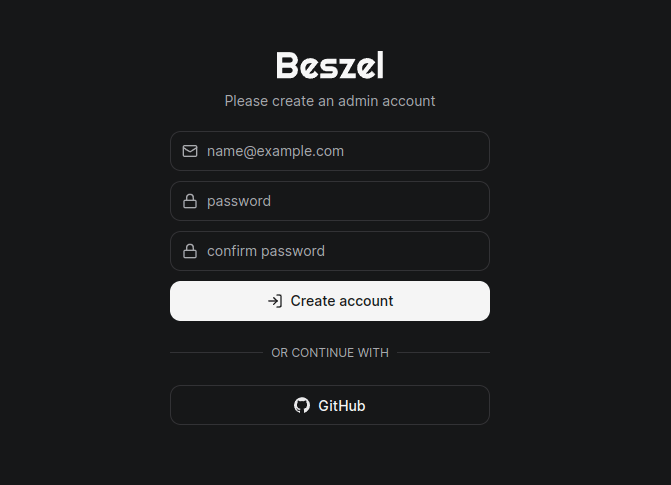
Once the hub is starting, I opened my browser and navigate to http://localhost:8090 or your chosen address.
You will be prompted to create an account:
Configure your first system
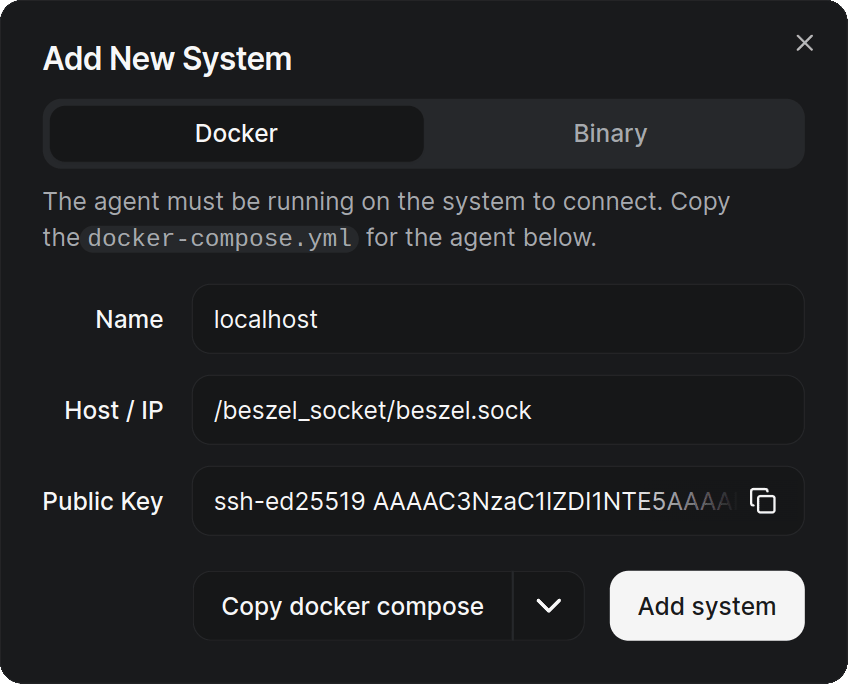
In the Beszel Interface, click the Add System button in the top right corner to open the system creation dialog. We’re using a local unix socket in this example, but you can use a remote agent instead.
Do not click the Add System button inside the dialog until you’ve started up the agent.
If you configure like me (services: beszel and beszel-agent), use the /beszel_socket/beszel.sock as Host/IP not your IP address
Copy the Public Key from the dialog, update the KEY field in previous docker-compose.yml , and re-run docker compose up -d .
1
2
3
4
5
6
7
8
9
10
11
12
13
14
15
16
17
18
19
20
21
22
# docker-compose.yaml for agent on another machine
  beszel-agent:
    image: ghcr.io/arunoruto/beszel-agent:latest
    container_name: beszel-agent
    restart: unless-stopped
    network_mode: host
    volumes:
      - /var/run/docker.sock:/var/run/docker.sock:ro
      - /fast_data:/extra-filesystems/SSD:ro
    environment:
      LISTEN: 33873
      GPU: true
      # Do not remove quotes around the key
      KEY: 'ssh-ed25519 xxxxxxxx'
    deploy:
      resources:
        reservations:
          devices:
            - driver: nvidia
              count: all
              capabilities:
                - utility
Setting Up an Agent on Another Machine
If you want to monitor a different machine, use the docker-compose.yaml above, and run docker-compose up -d to start the beszel-agent
Make sure to allow the port through your firewall (e.g., sudo ufw allow 33873). Then back in the beszel web interface, use the Add System dialog to input the machine’s IP and port (33873 in this case).
Enabling GPU Support
For GPU monitor, switching the agent image to ghcr.io/arunoruto/beszel-agent:latest , add GPU: true to the environment variables, and include deploy section to give Docker access to your GPUs.
Monitoring Additional SSDs
To track another SSD, add a volume mapping like this:
1
2
volumes:
	- </path/to/ssd-mount>:/extra-filesystems/SSD:ro
Just replace /path/to/ssd-mount with the actual mount point of your SSD.
Adding Alerts with Lark
In order to receive alerts on my phone, I set up notifications using a Lark Robot.
Modifying the code
Lark only accepts JSON messages via webhook, so I tweaked the Beszel source code in beszel/beszel/internal/alerts/alerts.go to support this.
1
2
3
4
5
6
7
8
9
10
11
12
13
14
15
16
17
18
19
20
21
22
23
24
25
package alerts

import (
	....
+	"encoding/json"
)

func (am *AlertManager) SendShoutrrrAlert(notificationUrl, title, message, link, linkText string) error {
...
+	if scheme[:7] == "generic" {
+		msg_data := map[string]interface{}{
+			"title": title,
+			"msg": message,
+			"linkText": linkText,
+		}
+
+		jsonBytes, err := json.Marshal(msg_data)
+		if err != nil {
+			am.app.Logger().Error("Webhook Json failed", err)
+		} else {
+			message = string(jsonBytes)
+		}
+	}
...
}
After making the change, I rebuilt Beszel.
1
2
3
4
5
cd /path/to/beszel/beszel
# build go project first
make build
# build the docker image for hub, change <your-name> to whatever you like
DOCKER_BUILDKIT=1 docker build -f dockerfile_Hub -t <your-name>/beszel .
Replace <your-name> with your preferred Docker Hub username or tag.
Configuring Lark Action
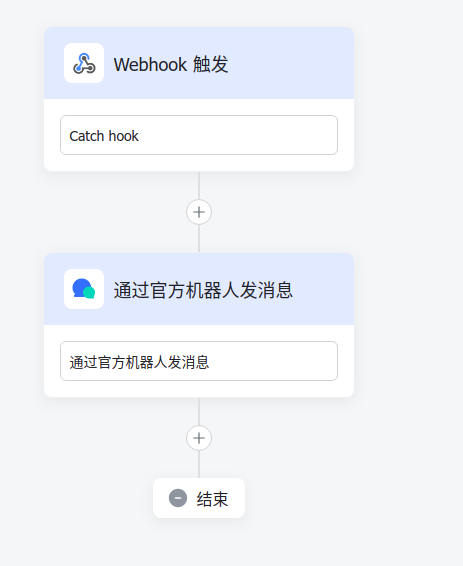
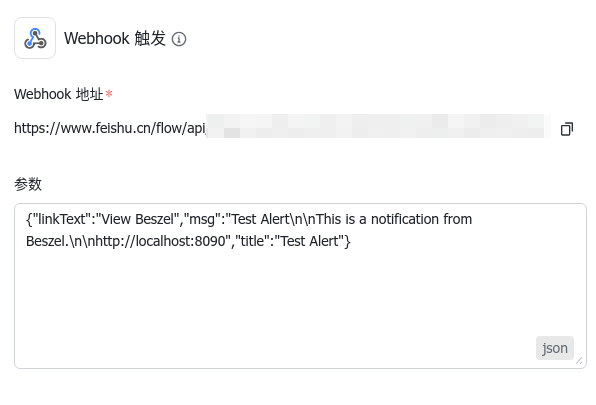
To automate alerts, I used Robot Assistant to create a new action:
I set up a webhook to receive the JSON content, matching the parameters to the data sent by Beszel.
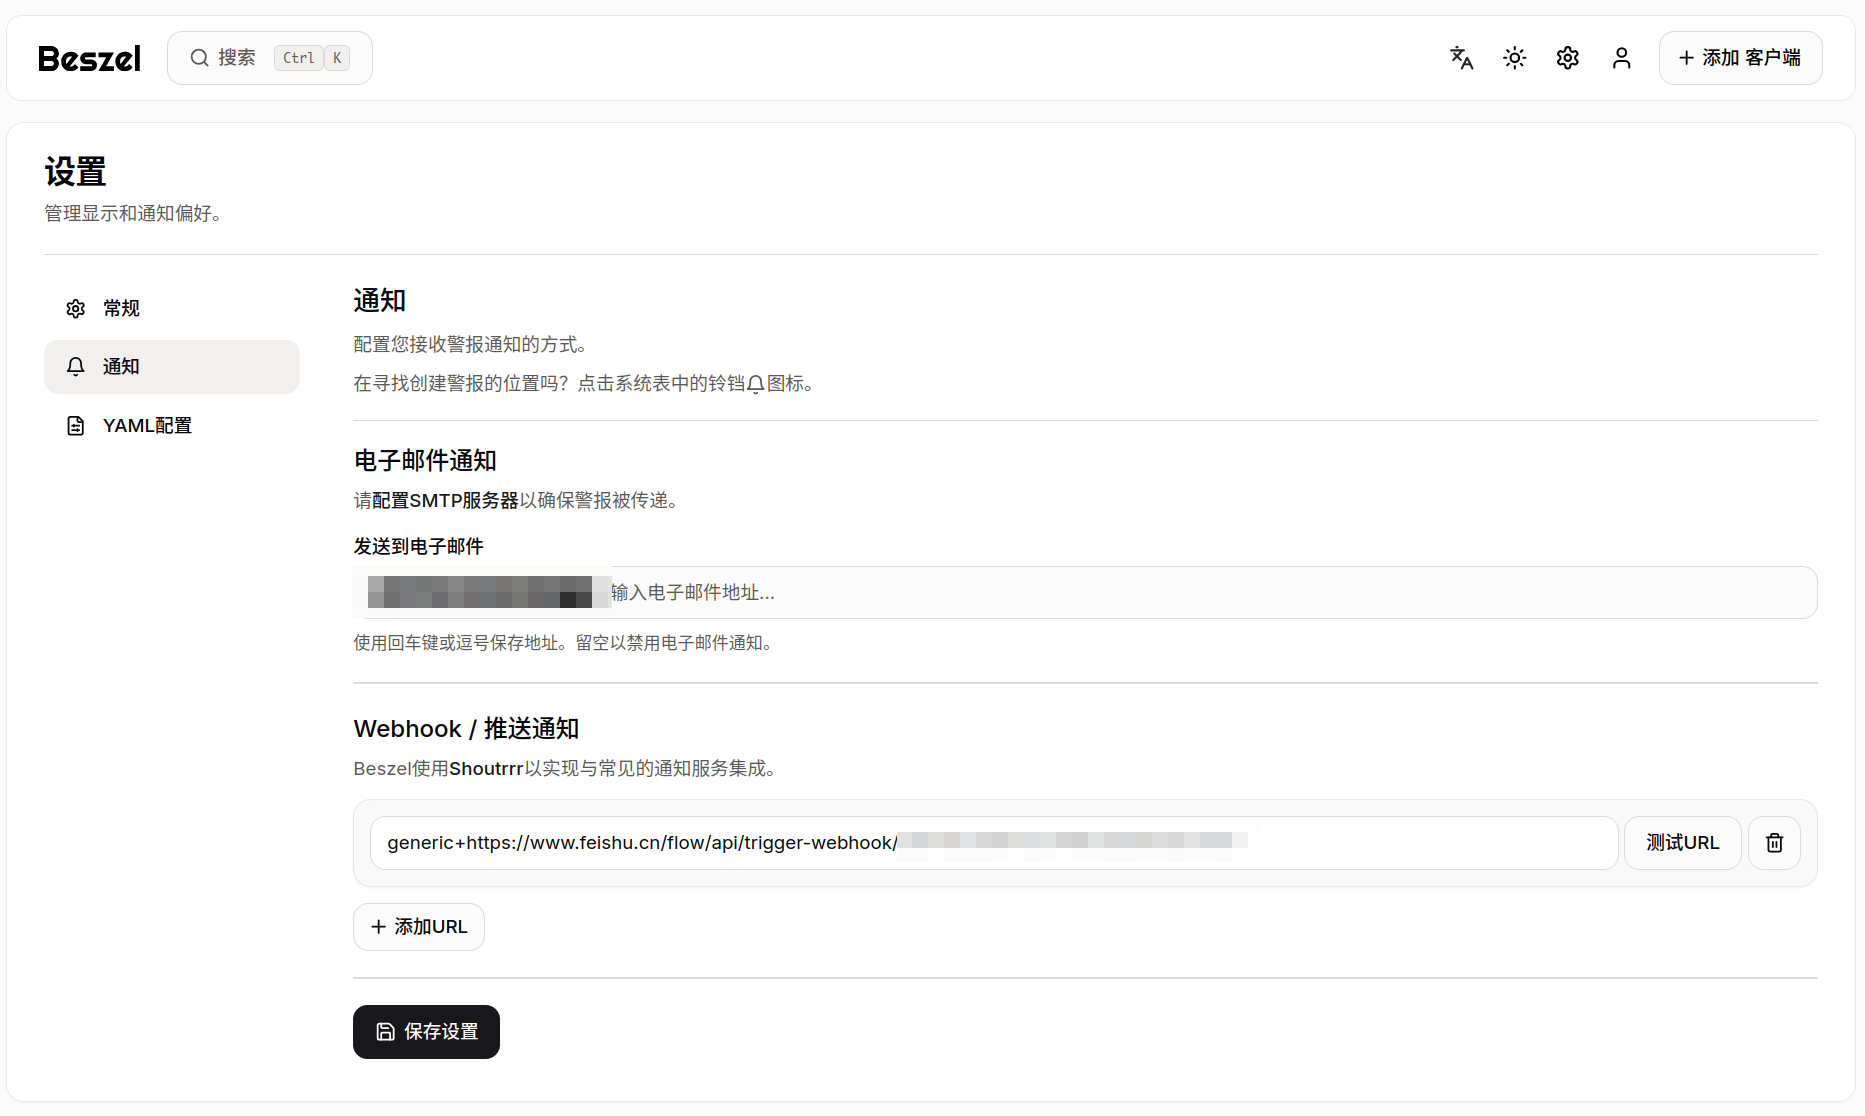
 In Beszel’s settings, I added the Webhook URL with
 generic+ prefix, followed by the API URL provided by Lark:
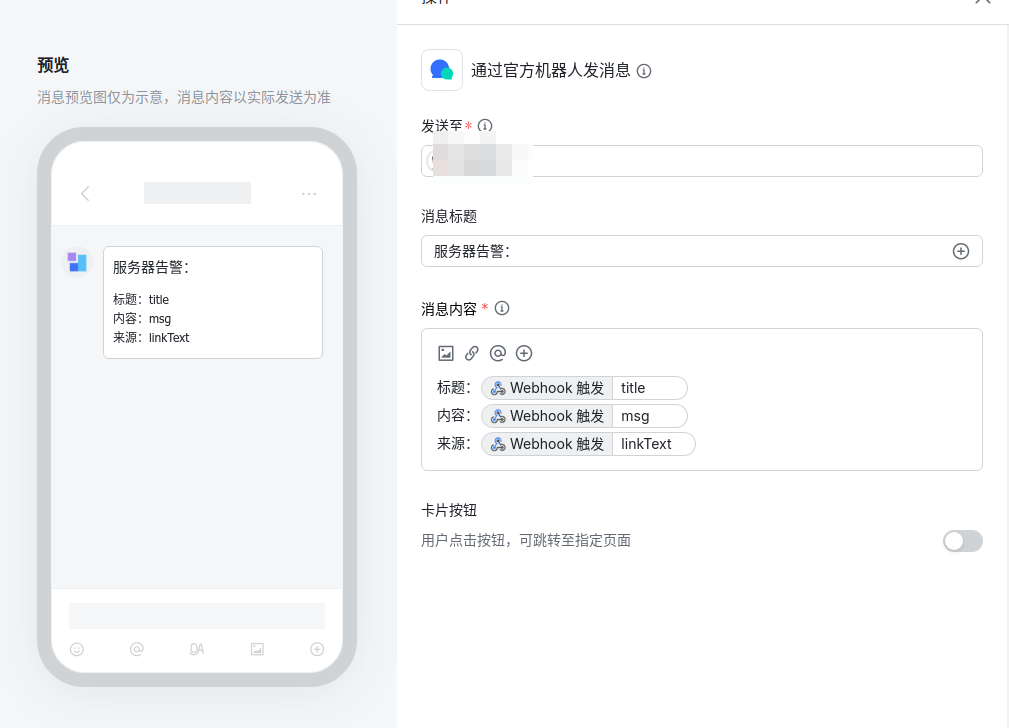
Finally, I used Lark’s internal action to send a custom message to my phone. You can tweak the message content however you like:
Now, I get alerts straight to my phone whenever something needs my attention.
References
TODO
- block I/O monitoring for every container and related actions
- display and action on custom extra filesystem

